Sinaha Platform-Buy From Factory Direct
-
-
Food Stuff
- PLASTIC
- DRINKS
- Beauty and personal care
- PAPER
- Home Care
- PACKAGING
- Clothes
- PersonalCare
- Shoes
- Furniture
-
Building
-
Building & Construction
- Advertising & Sign Boards
- Barriers
- Caravans
- Cements
- Electrical & Electronics
- Insulations
- Paints
- Pipes & Fittings
- Solar Systems
- Steel & Metals
- STRAPS
- WPC
- Adhesives, Sealants & Coatings
- Aluminum and Glass
- Blocks, Bricks and Tiles
- Design & Architectural Concrete
- Doors, Windows & Accessories
- Polyethylene Sheets
- Scaffolding and ladders
- Fabrication Support
-
Building & Construction
- Electricity
- Transportation
- Machinery
-
Made In Abu Dhabi
- Electric Heaters
- Home and Living
- Food and Drinks
- Stationery
- Plastic Products
- Medical supplies
- Tents and Shades
- Egg and Poultry
- Oil & Ghee
- Footwear
- Safety Shoes
- Juice
- Water
- Kitchen Appliances
- Tahina
- Women Accessories
- Men Accessories
- Sandals
- Boys Shoes
- Leather Products
- Bags
- Disinfectant
- Paper Products
- Detergents
- Tissues
- Sanitizers
- Textile
- Yarn
- Transportation
- Auto Spare Parts
- Raw Materials
- Milk and Dairy Products
- Automotive
- Machinery & Iron Hardware
- Material Handling Products
- Machinery Equipment
- Trailers & Buses
- Pulses & Beans
- Spices
- Clothes & Textiles
- Vegetables & Fruits
- Fertilizer & Pesticides
- Fire & Safety
- Decoration & Furniture
- Dates
- Rice & Flours
- Handwash
- Building & Construction
- Packaging and Disposable Products
- Detergents and Disinfectant
- Medical Supplies
- Halls and Umbrellas
- Oils & Greases
- Trailers
- Stationery
-
Food Stuff
STEP BY STEP GUIDE ON HOW TO UPLOAD PRODUCTS ON YOUR SINAHA SELLER ACCOUNT
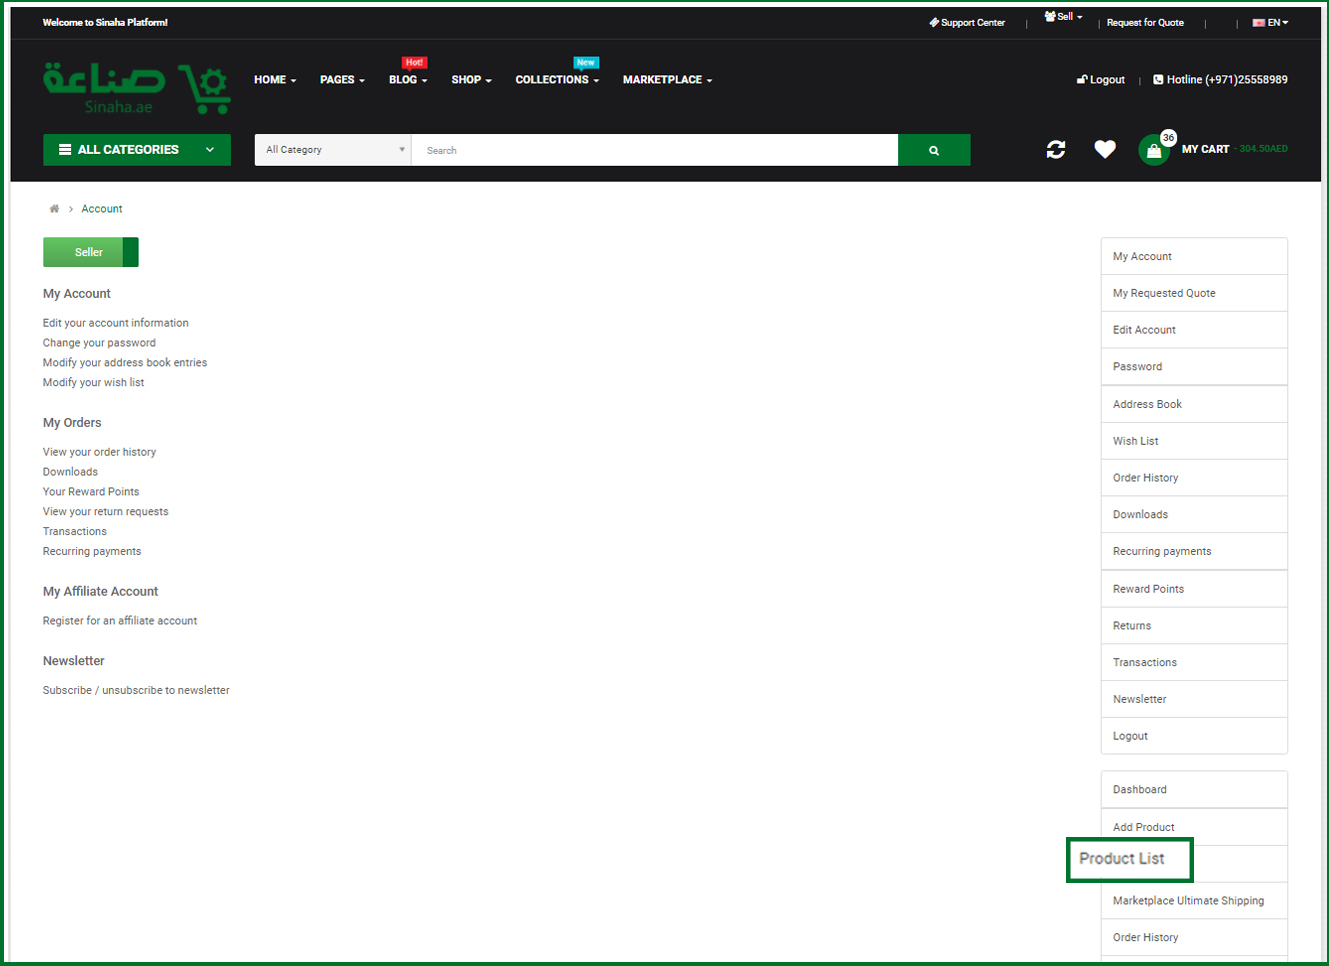
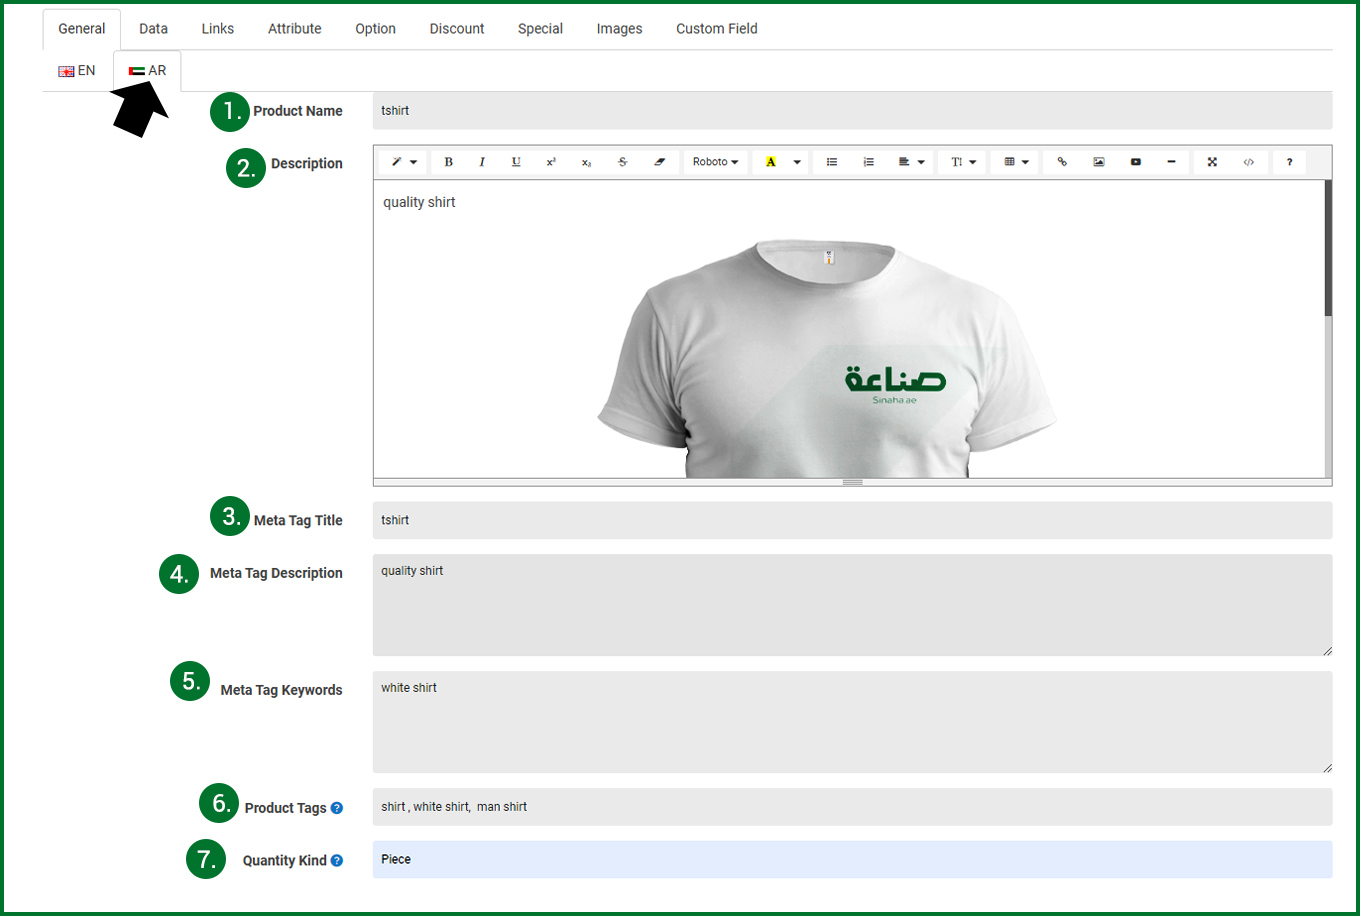
STEP 2: You will be directed to the General Page with EN and AR. First, fill in the details needed for EN, when you’re done kindly copy and paste all the information to the AR. Please note that all information in EN and AR must be same.
GENERAL PAGE
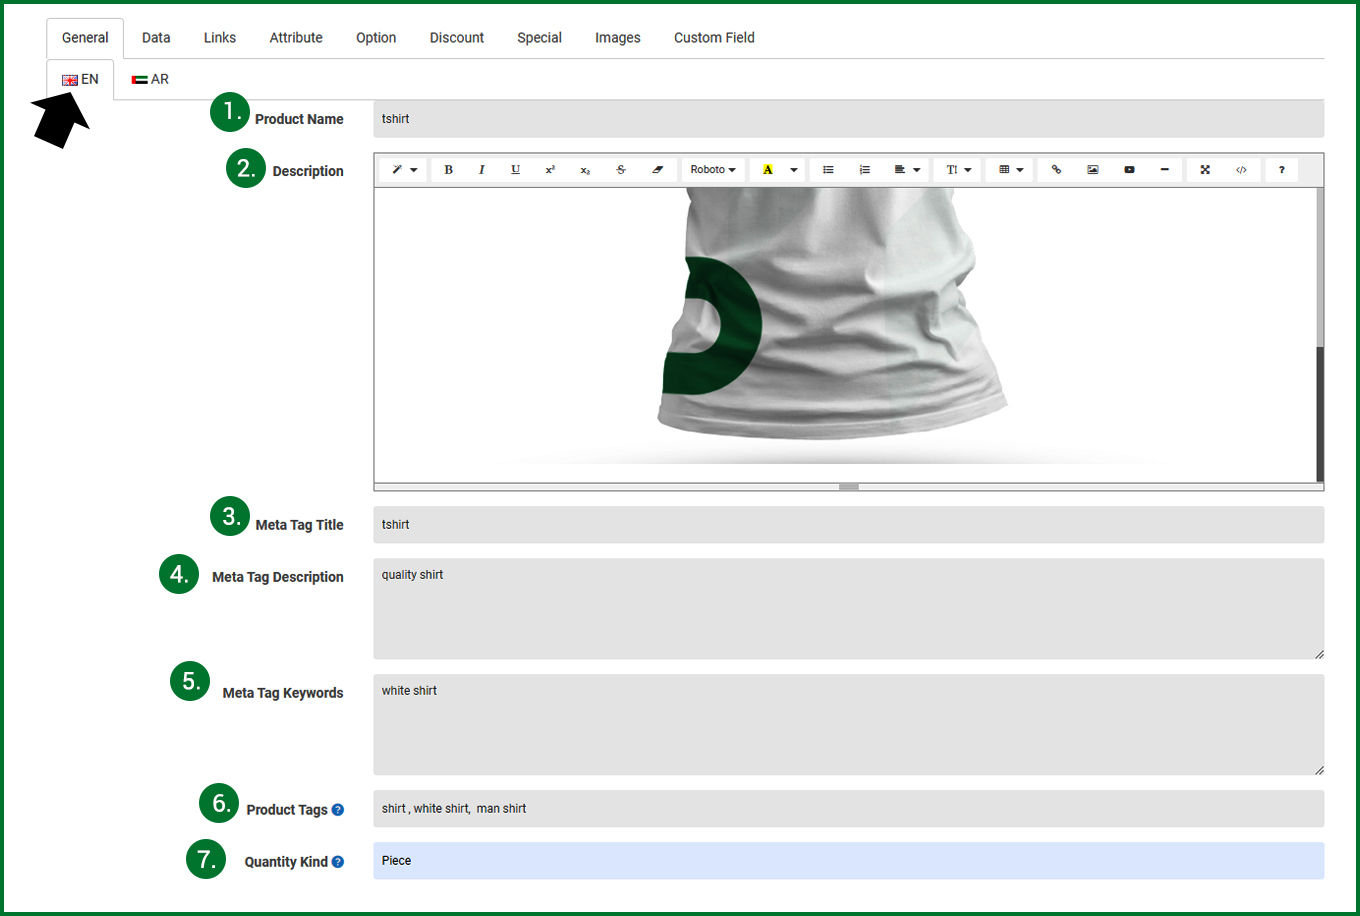
1. Product Name: You will type here the name of your product you want to post. Example: T-shirt
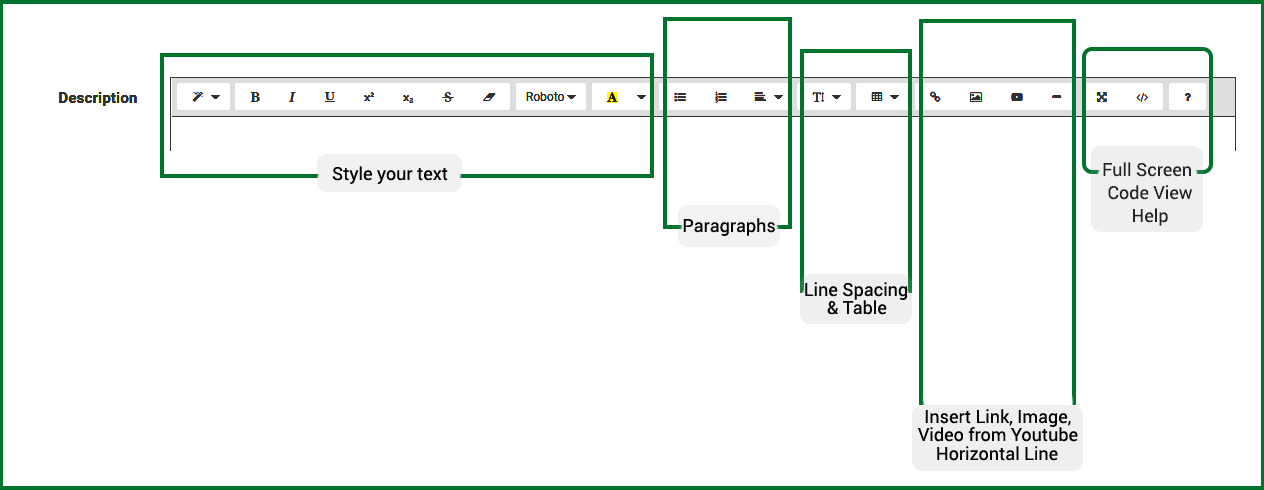
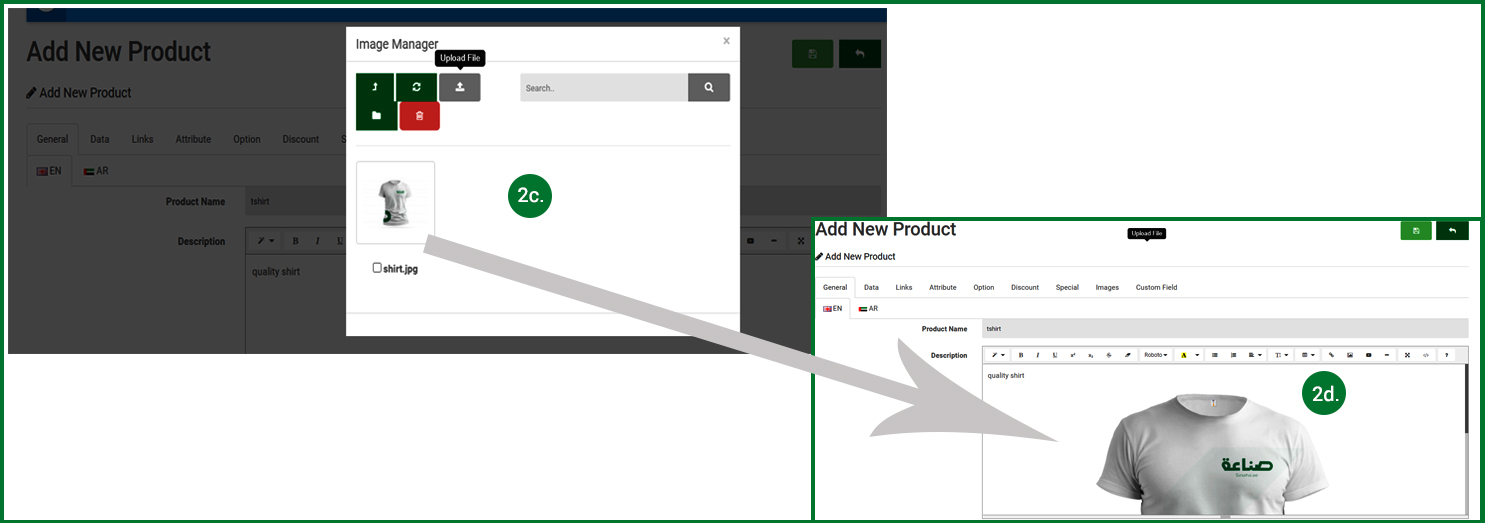
2. Description: This Box have many options to create unique description of your product.
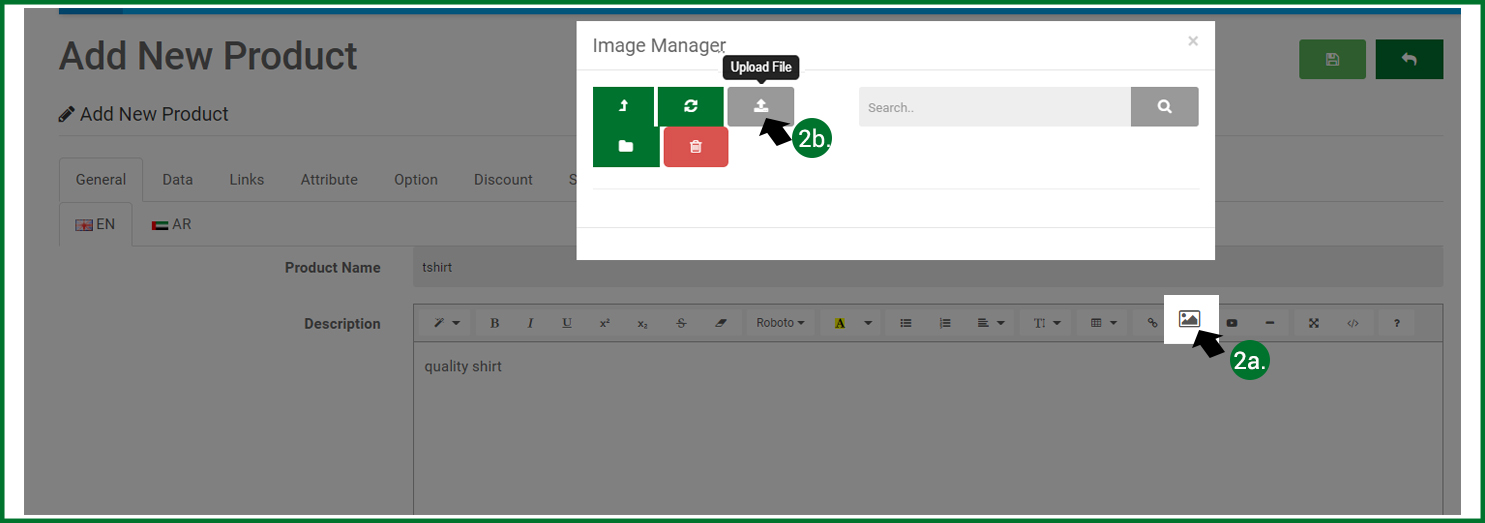
2b. Click Upload File. Choose the image you want to be shown on your product description.
Copy and Paste all information you put in EN to AR.

PROCEED to NEXT PAGE LINKS...
STEP 4 : Fill out all the important information under Links.

1. Manufacturer: Type here your factory name.
2. Category: You will choose here on which category your product belongs. Example Clothes and Textiles > Men clothes
3-4. Filters and Downloads: You may leave that empty
5. Related Products: Here you can put all the related products you uploaded.
Proceed to Option...
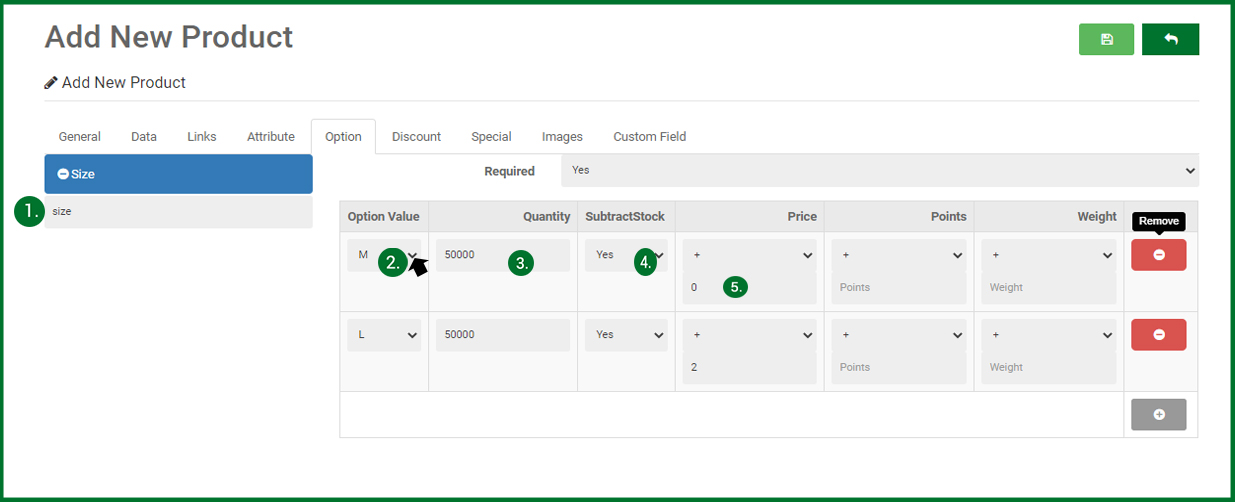
STEP 5: Option Page is for your product which have options. Example: Tshirt have different sizes.
1. Type the option you want to put. Example: Size.
Click the size so that the table 2 - 5 will appear.
2. Option Value: Click that to see all the different sizes and choose the size.
3. Quantity : Here you will put the stocks of that product.
4. SubtractStock: Click YES if you want to subtract the stock when there is order and No if you don’t want your quantity to change.
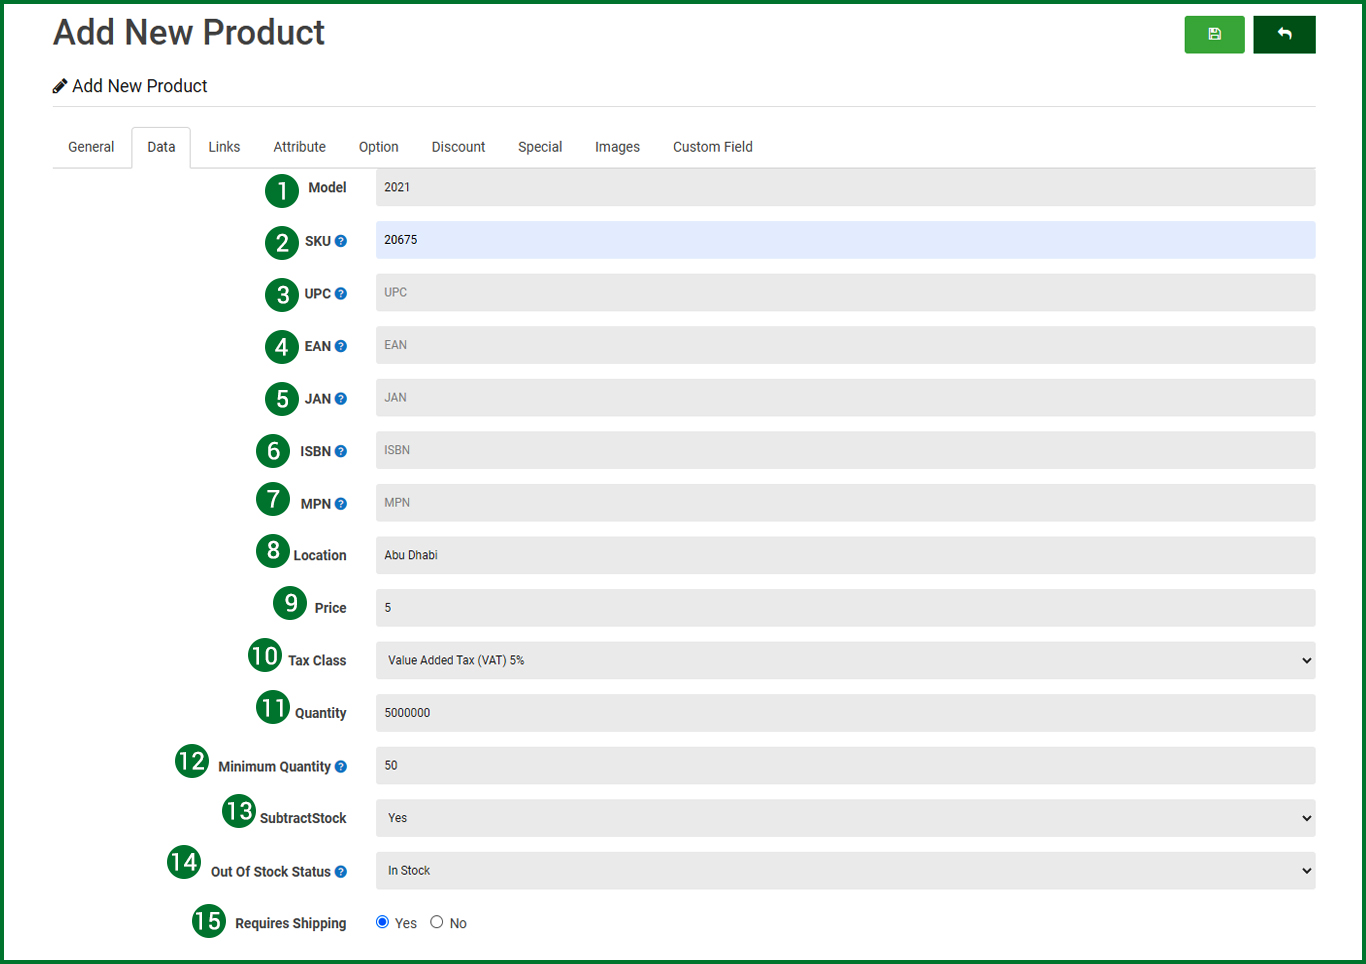
5. Price: Here you will put 0 if the price is the same with the price you put under STEP 3 #9… Otherwise if the price is different for example the large shirt amounting to 7AED, you will only put 2 because there is already 5AED under step 3.
Note: you can contact us to add your desired option for your product.
Proceed to DISCOUNT...
STEP 6: Discount page allows you to put discount for your original price.
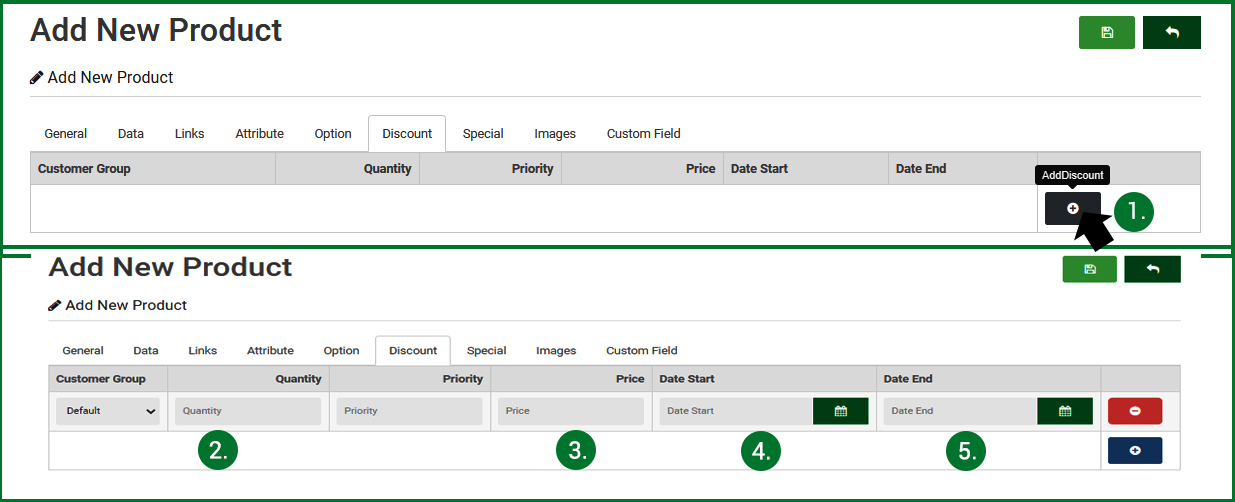
1. Click the plus sign (+) on the right side of the page to Add Discount.
2. On the quantity textbox type how many stock of the discounted item.
3. Put the discounted price here. Example: Original price is 5AED and discounted price is 4 AED. Kindly put 4 AED.
4. Put the starting date of your discount.
5. Put the end date of the discount.
PROCEED TO SPECIAL...
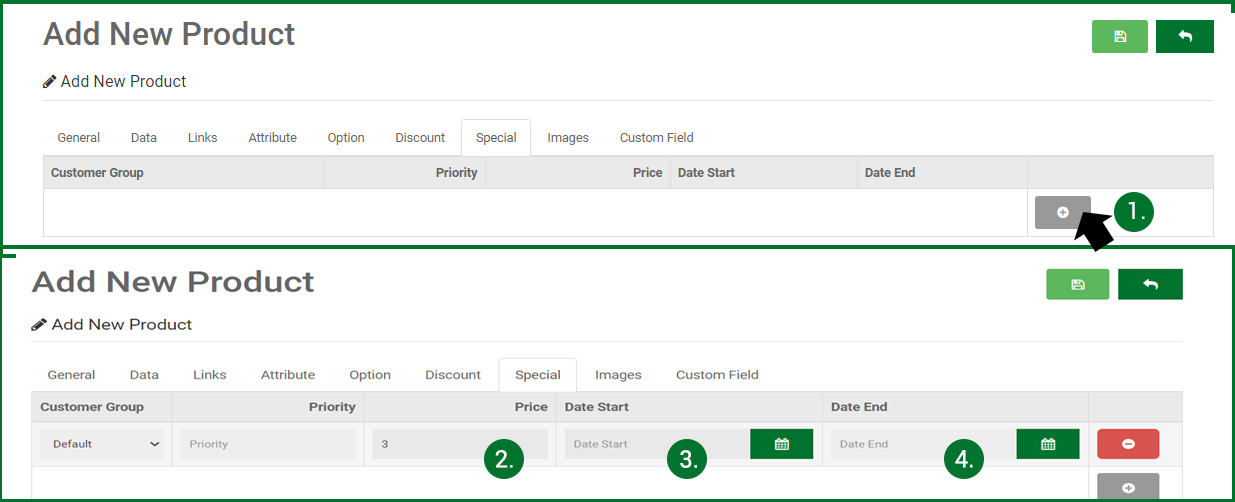
STEP 7: Special page lets you put special discount for your product for a limited time.
1. This procedure is like putting discounts under Step 6.
PROCEED TO IMAGES...
STEP 8: IMAGES. Final stage for uploading. Here you can put images of the different angles of your products.
1. Click the (+) sign to add image.
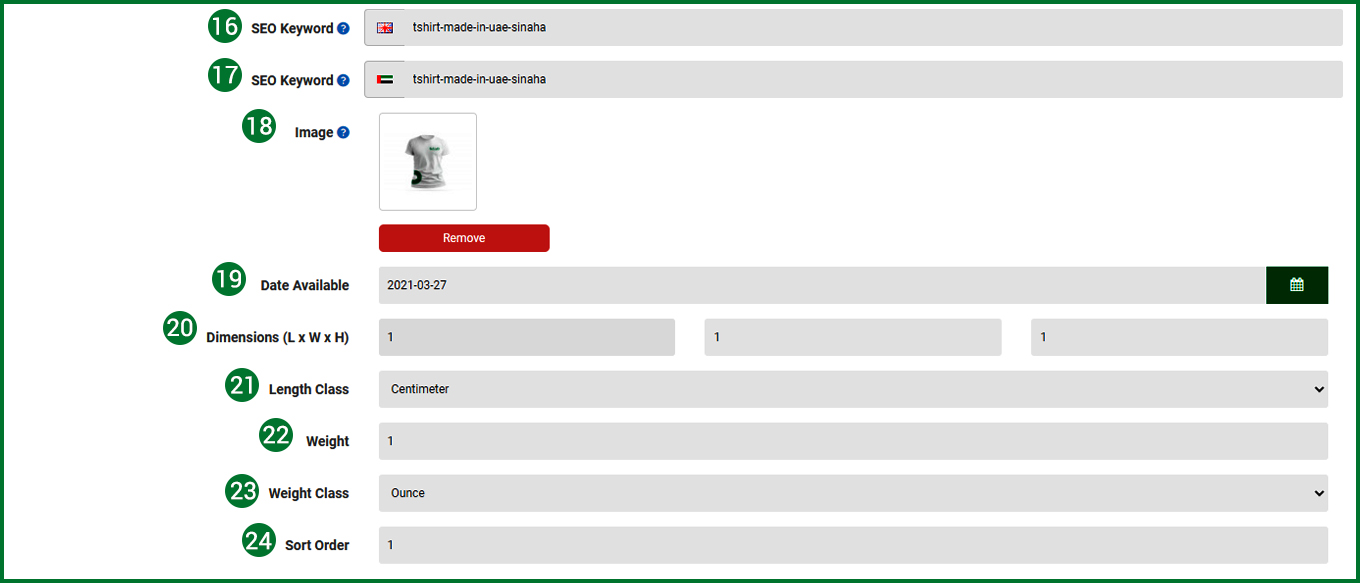
2. This is like the procedure on STEP 3 Data Page #18. If you want to add more. Click the add (+) sign again.

STEP 9: This is very important step. Click the save button at the top to save what you uploaded.


